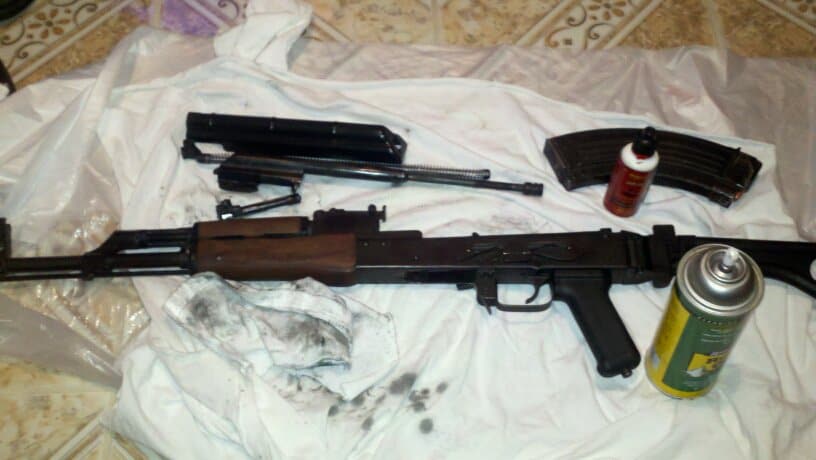
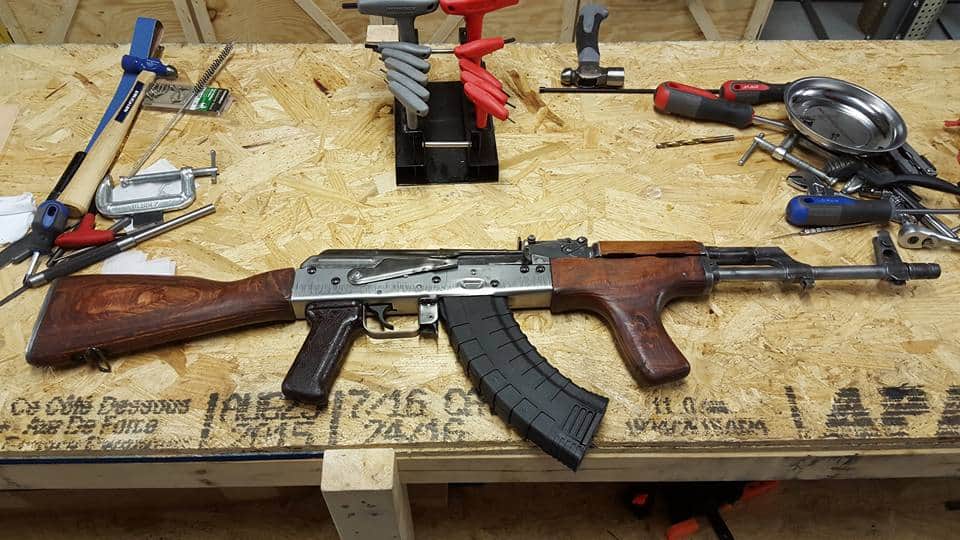
You can’t expect your rifle to work nice and smooth even after you ignored it for God knows how long.
No, it doesn’t work like that. Your rifle will treat you as you treat your rifle.
You definitely don’t want your rifle to misbehave right at the time of emergency. You need to take care of your defense arm for it to take care of you.

Don’t worry if you are a novice in this, I have explained the cleaning process in the simplest way possible for you. I bet you can ace it even on the first try.
Why Cleaning An AK 47 Is Important?
You need to know what happens if you don’t clean your rifle. You should know the actual reason behind why your rifle needs cleaning.
From the outside, you might not feel the difference. Just dust depositing on the outer surface that you can wipe out when you are using the rifle. But this is not the actual scenario. The changes occur from the inside. It starts deteriorating from inside that completely ruins the rifle at the end.
The main cause of this deterioration is the build-up of grimy residues. When the bullet is fired it leaves fragments of carbon, lead, and copper in the barrel. With each time firing, deposition on the inner components increase which needs attention.
What happens if you leave it as it is?
Well, this is the last thing that you would want for your rifle. The residual build-ups in turn cause corrosion of the inner components. The residues coming in contact with catalysts like humidity or water cause rusting. By the time the rusting effect occurs outside, the inner components will be totally damaged.
This will totally wreck your rifle. The common issue that you will face is failure to fire. It’s dangerous for your life if you’re using the rifle for self-defense. The error may also involve ammo jamming in the barrel. There is also a possibility of the live round blowing up in the rifle and this is extremely dangerous.
Cleaning regularly lessens your chances of experiencing such failures while shooting.
Cleaning AK 47 Instructions
The first task of the cleaning session is to settle everything in a designated area. Select a place with adequate ventilation. Get all your supplies ready in front of you so that you can get everything right by your hand.
Before you initiate you must unload the rifle. Unload the magazine and mAKe sure there is no ammo present in the chamber. So, remove the safety on the bolt check inside. You never should avoid this safety check and ensure the rifle is unloaded.
After you are done with the initials, you can proceed to the main session. The total cleaning session includes 3 main phases: field stripping, cleaning, and reassembling.
It might seem a lot to take at a time but I have explained all 3 of them step by step in simple words. You will be able to get it in one go. So, let’s get started!
How To Field Strip AK 47 For Cleaning

Field stripping is the act of disassembling a firearm. Not a hard job but requires following the instructions strictly not to ruin the rifle. You won’t be needing any extra tools for it. Field stripping is different from detail stripping. For regular maintenance field stripping is sufficient.
Step 1:
The first step is to pop open the receiver cover. You have to push a button present at the end of the recoil guide. This will help loosen the cover to be lifted from the receiver.
Step 2:
The next step is to remove the recoil guide and the spring. Push the recoil guide forward till it clears the receiver slot. Then lift it out of the bolt carrier by pulling.
Step 3:
Now it’s the turn of the bolt carrier. For taking out the bolt carrier you need to make sure the safety is in the fire position. Gently hold the bolt handle and pull it backward. This action will release the bolt carrier’s grip allowing you to simply pull it out off the gas tube.
Step 4:
You need to further disassemble the bolt carrier for a thorough cleaning. Rotate the bolt head from the front. This will help to get the bolt head out of the locking groove.
Step 5:
Again, back to the main body of the rifle. Now it’s time for separating the gas tube. It is locked with a lever. You need to move this lever 45 degrees upward. Then start lifting the tube from the rear section as it will be easier this way. Any flat head driver can come in handy as an AK47 barrel removal. Once you become successful in doing so, take the whole guard off.
Done! Your AK 47 is disassembled into elementary components. You can now start cleaning your rifle.
How to Clean AK 47 Step by Step

Field stripping can seem a little tricky but cleaning the AK 47 is not a hard task. Following the simple steps, you can complete your cleaning session.
Step 1:
First, start with the barrel. To clean the barrel, you need the bore brush. Soak the bore brush with the cleaner properly. Then push the brush attached to the rod through the barrel. Remove the wire brush off from the rod when pulling back it through the barrel. Repeat the action couple of times.
Step 2:
The next step is to clean the barrel a second time. In this step, you have to clean the barrel with the cleaning patches. This action will remove the excess cleaner and leftover dirt. You need to attach the cleaning patches to the rod. Then pass it through the chamber. Again, detach the patch before pulling it back. Repeat the action until the patch comes clean.
When you are satisfied with the cleaning, soak a patch with a lubricant and pass it through the barrel.
Step 3:
Now it’s time for the receiver. Take a metal brush and clean all the reachable areas of the receiver. Remove the loose dirt and residues as much as you can. For cleaning the inner unreachable areas, use a cotton swab. Soak the swab on the bore cleaner and complete the task.
After cleaning, lubricate the receiver components properly.
Step 4:
Then you can move to the gas tube. The gas tube has some opened parts that you have to clean separately. Get a cotton swab for cleaning the delicate and unreachable areas. And for the bore use the cleaning rod. Soak the swab on the cleaner first.
As for the gas tube, you are asked not to lubricate it. Lubricating the gas tube causes unwanted quick griming. But you have to lubricate the gas tube locking lever beside it.
Step 5:
Next is the piston. Clean the piston with a bore cleaner. Like the gas tube, you do not have to lubricate the piston.
Step 6:
In the following time clean the rest part of the bolt carrier. The bolt carrier has tiny unreachable areas. You need to use a cotton swab to clean those areas. Dip the swab on the cleaner and clean the bolt and the bolt face thoroughly.
After cleaning you also need to lubricate those areas.
This is the end of the cleaning session. Now you have to resemble your rifle in one piece.
How to Reassemble AK 47 after Cleaning

To reassemble you just have to go through the field stripping steps in the reverse order and the only difference is that you have to reattach them this time. You have to follow each step sequentially.
Step 1:
First is the gas tube. You have to start with the front section. This will leave the rear side at a 45-degree angle. Then gently push down the raised part to lock it. After you successfully insert the gas tube, lower the lever.
Step 2:
Then comes the turn of the bolt carrier. You need to reattach the separated parts first. Drive the bolt face and shaft into the bolt lining with the groove. Then turn the bolt face until it’s locked.
Later place the total bolt carrier on the mainframe of the rifle. Maintain the line on its rail and push it forward until it gets locked inside nice and perfect.
Step 3:
Following the bolt carrier now you have to put the recoil spring. Let the spring go through the bolt carrier and sit on the slot. Push with your finger until it gets locked.
Step 4:
The last component is the receiver cover. Put the front section first and then the rear side. This will get locked with a click sound letting the button move through the lock hole.
Hence the rifle is reassembled in one piece. You should not skip any step or break the order. Otherwise, there are high chances you may damage your rifle.
After reassembling, test the functionality of the rifle thoroughly. Then wipe out the rifle one last time holistically as the final touch. This will be the end of your rifle cleaning session.
Best Cleaning Kit for AK 47
You will be needing some common AK 47 cleaning kit for the routine maintenance work. These are some of the cleaning kits I am mentioning that can be used for cleaning an AK 47.
Real Avid Gun Boss 7.62MM Cleaning Kit (AVGCKAK47)

It is an AK 47 tool kit that includes all the important equipment required for cleaning a rifle. The most important one is AK 47 cleaning rod which comes along with some necessary detachable heads. The rod itself can be disassembled into 6 threaded mini rods and fit the small zippered case it comes in. The whole kit is a portable one that you can carry along with you anywhere.
PHILSKY Large Padded Gun Cleaning Mat-45″x20″

PHILSKY Large Padded Gun Cleaning Mat measures 45” x 20” and is 2mm thick. The oversized design gives plenty of room to disassemble your handgun and clean it without having to move parts all over. The soft surface ensures your gun doesn’t get scratched and prevents the mat from sliding. This mat will also keep harmful chemicals, oil, and dirt from penetrating down to your desk, bench, or work area. It is waterproof, scratchproof, fade, and oil resistant dye-sublimation printing.
Final Words
Every machine needs attention and your rifle is no different. It has to be treated nicely for you to get a nice treatment back.
The cleaning session does not take that much time. Cleaning an AK 47 is not hard. At least it is not more than the regret you will have after your rifle stops working when you need it the most. It’s always better to keep it in check and maintain it properly.
As now you know how to clean an AK47, you must take time to clean your rifle.
Leave a Reply